1 Introduction
1.1 Learning objectives
Lorem ipsum dolor sit amet, consectetur adipiscing elit. Pellentesque laoreet tortor nec eros mollis aliquam id eu libero. Aenean ac elit ex. Sed sit amet sagittis erat. Donec ornare arcu sed eros pharetra finibus. Fusce pharetra lacus iaculis, volutpat felis vel, tristique diam. Sed a leo vestibulum, rutrum libero quis, dapibus ex. Ut venenatis felis et facilisis blandit. Sed eu porttitor tellus. Maecenas feugiat congue malesuada. Phasellus in sem lectus. Proin commodo lobortis nibh, sed blandit metus venenatis in. Etiam sit amet lacus eget metus egestas congue vitae eu dolor. Integer ultrices malesuada nulla sed sollicitudin. Mauris commodo nulla mauris, sed luctus nulla posuere sit amet. Mauris sodales nisl lacus, et pretium erat sollicitudin ac.
1.2 Tools
1.2.1 Excalidraw
Throughout this course, we will design and visualize many Kubernetes architectures before implementing them, and Excalidraw is the tool we chose for the job. It is an open-source virtual whiteboard that produces clean, hand-drawn-style sketches and runs entirely in the browser with no installation required.
However, if you prefer to work inside your editor, Excalidraw is also available as an extension for the most popular IDEs:
- VS Code: Excalidraw Editor on the Visual Studio Marketplace.
- JetBrains IDEs (IntelliJ, WebStorm, GoLand, CLion, etc.): Excalidraw Integration on the JetBrains Marketplace.
We use Excalidraw to design and visualize Kubernetes architectures before implementing them. Each chapter includes the source .excalidraw file alongside the exported PNG.
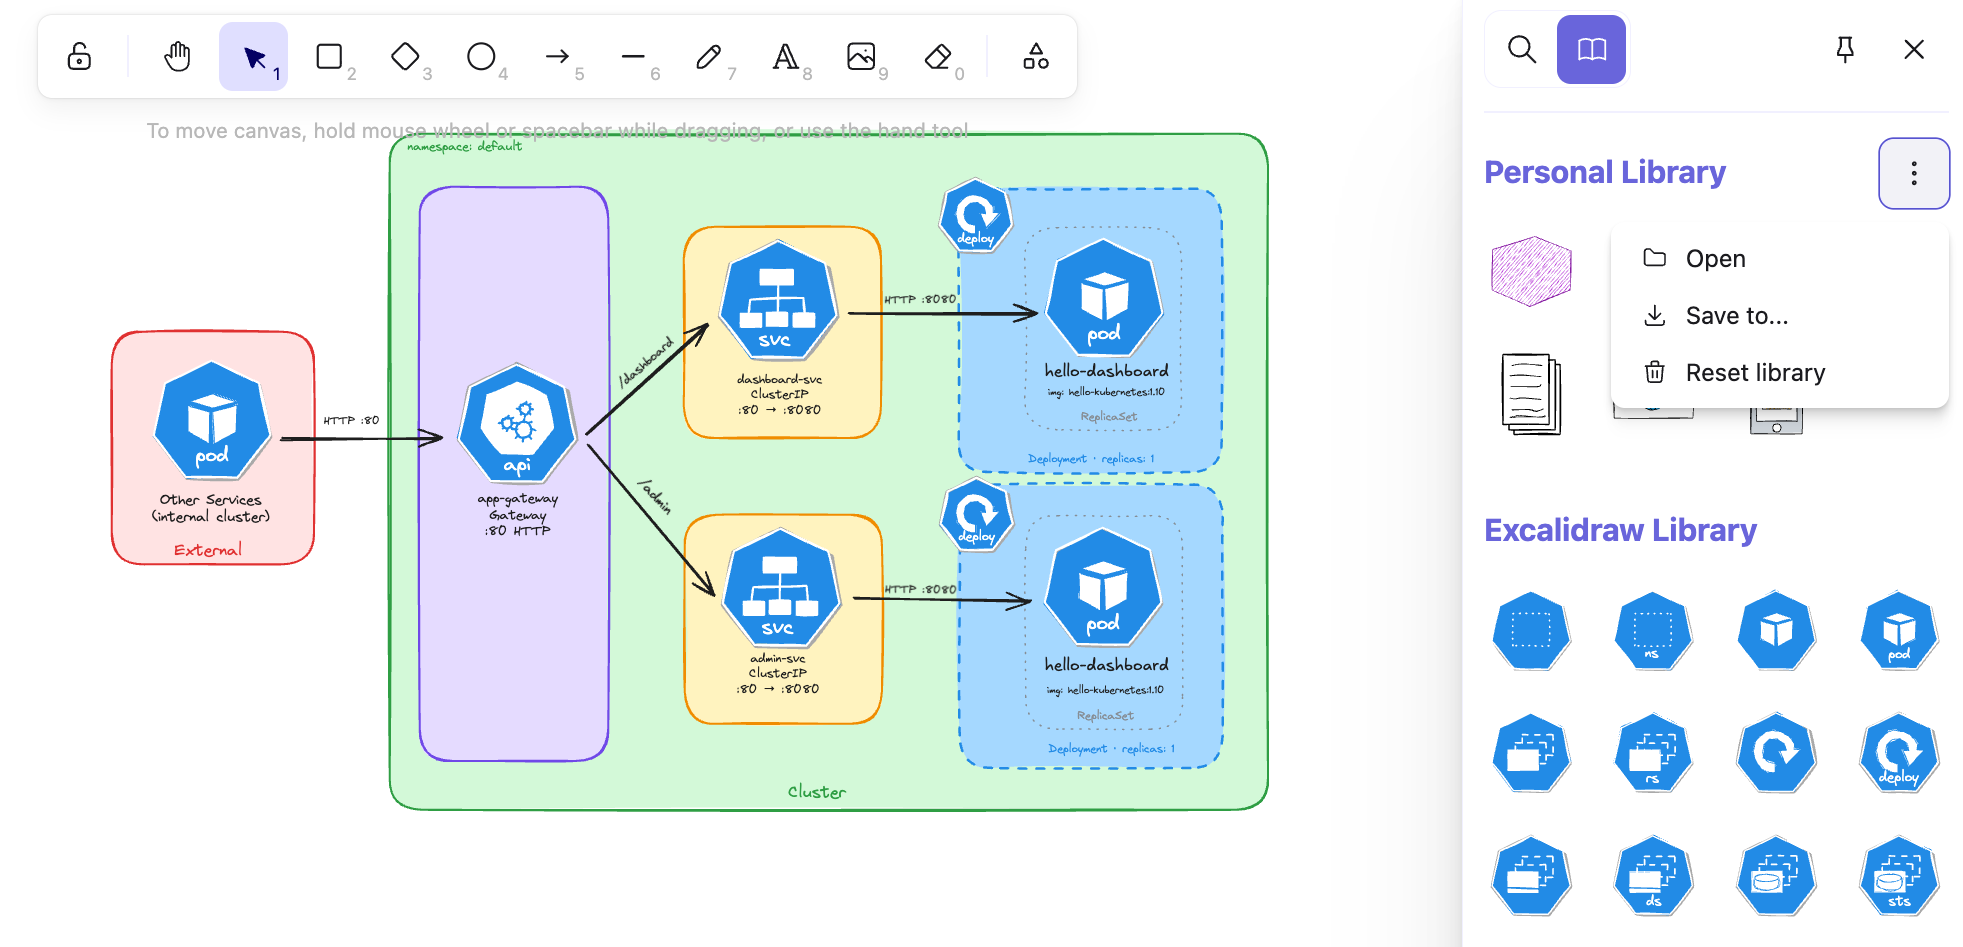
As an example, here is the architecture diagram for a Deployment exposed through a ClusterIP Service, reachable only from inside the cluster:

1.2.1.1 How to install Kubernetes icons in Excalidraw
In your local editor, open any .excalidraw file, then click Open in the right panel and select the .excalidrawlib file you want to import. The library will be added to your asset list, and you can start using the icons in your diagrams right away.
We used the Kubernetes Icons library for our diagrams, but feel free to explore other libraries or create your own!
The image below shows the import process in VS Code, but the steps are identical in the browser.
1.2.2 Killercoda
The best way to learn the tools used in this course is to use them hands-on in a safe, interactive environment with no local setup required. This is why we chose Killercoda as our playground:
Killercoda is a platform for learning and practicing skills in a safe and interactive environment. It provides hands-on experience with real-world tools and techniques, allowing users to develop their skills and knowledge in a practical way.
Killercoda offers a wide range of scenarios for various topics and skill levels. For this course specifically, we created a custom playground that includes all the tools and resources needed to complete the tasks. You can access it at https://killercoda.com/isislab/scenario/exam-playground.
1.2.2.1 How to use the Killercoda playground
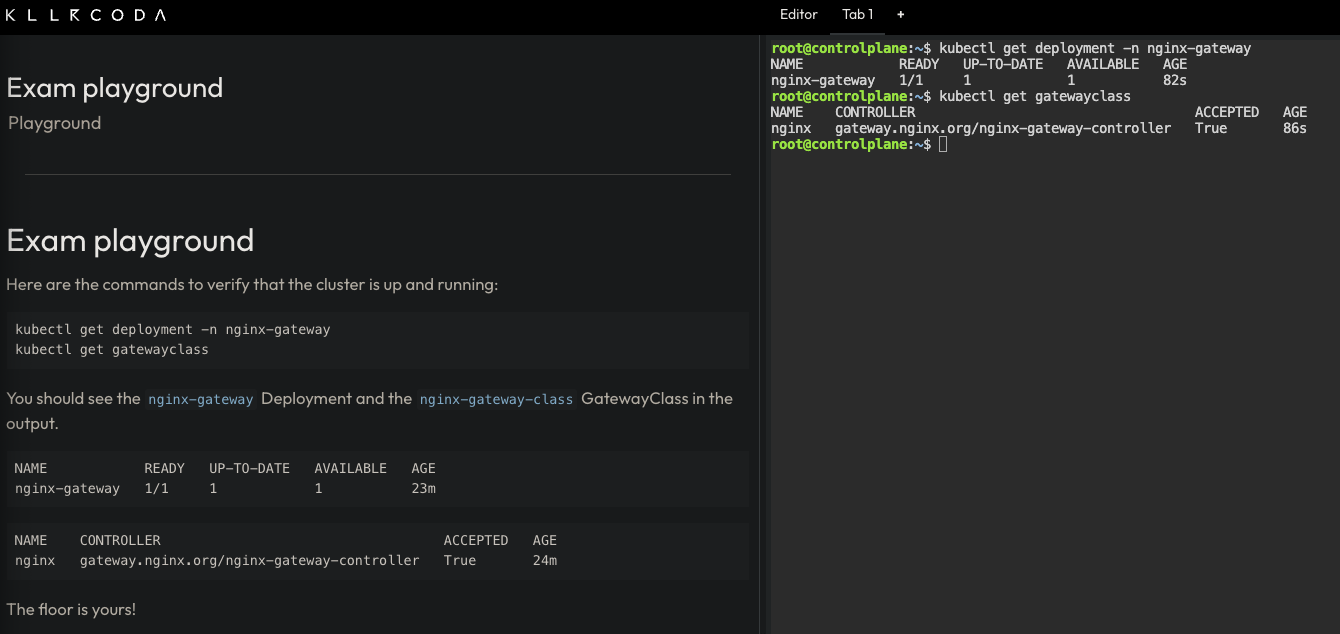
Navigate to https://killercoda.com/isislab/scenario/exam-playground and start the scenario. This will provision a Kubernetes cluster and deploy all the resources needed for the tasks.
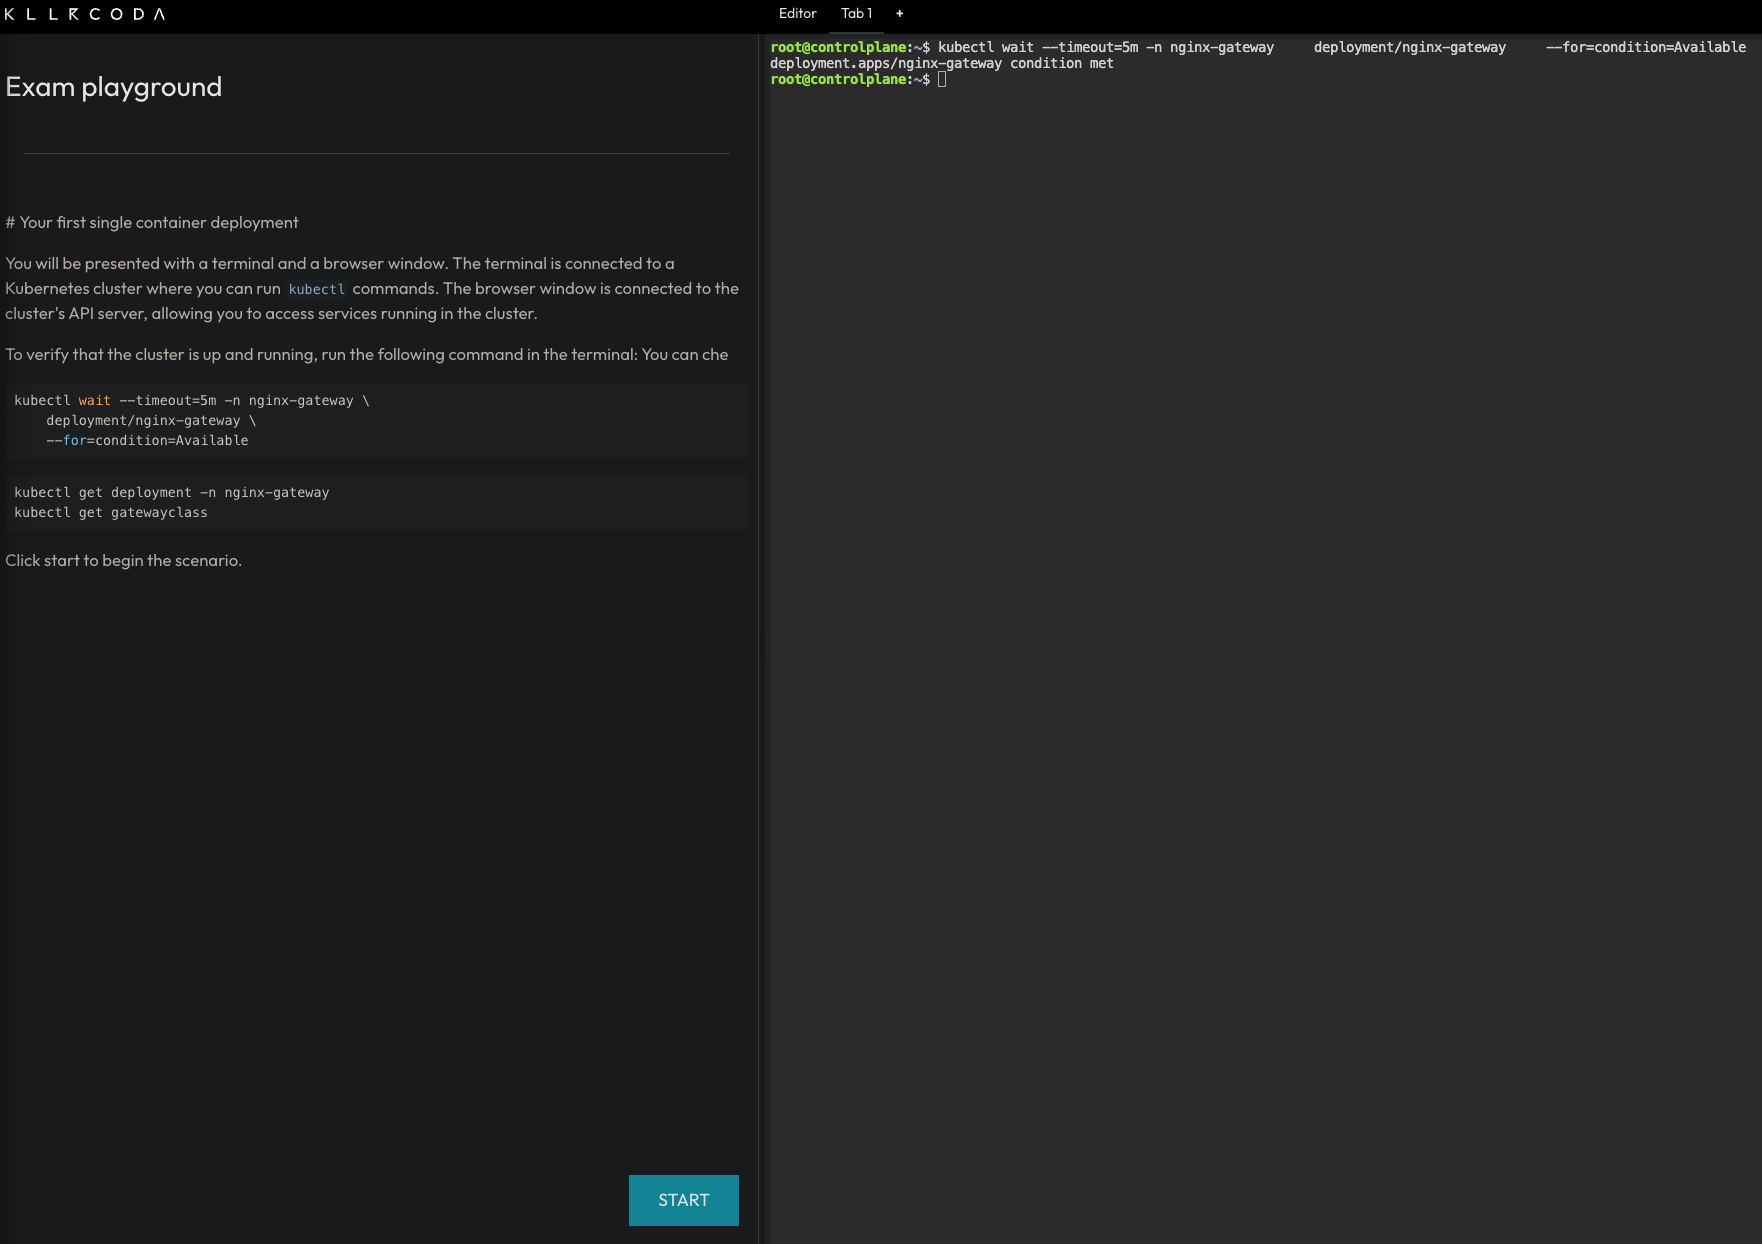
Once the setup completes, you will have a personal playground instance with a running Kubernetes cluster and a terminal with all the necessary tools pre-installed. Use this terminal to run kubectl commands and interact with the cluster as you work through the tasks.
1.2.3 Busybox
Busybox is a minimal Linux image that bundles many common Unix utilities into a single small executable. It is widely used in container environments where image size matters and a full OS is not needed.
In this course, we use Busybox as a lightweight Pod to run quick diagnostic commands inside the cluster without deploying a full application container. For example, checking network connectivity, resolving DNS, or inspecting environment variables.
To get a feel for it, you can run a Busybox container locally with Docker and explore the tools it provides:
docker run -it --rm busybox sh
This starts an interactive shell inside a Busybox container. From there, you can run commands like wget, ping, or env. These are the same utilities you will use later inside Kubernetes Pods.
1.3 How to contribute via GitHub
We welcome all kinds of contributions: bug fixes, content improvements, and suggestions for new exercises or topics. The project is fully hosted on GitHub. See CONTRIBUTING.md for setup instructions and the contribution workflow.
1.3.1 Adding a new topic
Create a Markdown file in the src directory and add an entry for it in SUMMARY.md.
Chapter, section, and subsection numbering is handled automatically by the preprocessor in book.toml. For example, # maps to 1., ## to 1.1., and ### to 1.1.1..
1.3.2 Adding a task to an existing topic
Add a new section at the appropriate heading level and follow the format of the existing tasks in that file.
1.3.3 Adding diagrams
Draw your diagram in Excalidraw and place the source .excalidraw file in src/diagrams. The build process will export it as a PNG to src/diagrams_images, which you can then reference in your Markdown file.